Tuesday, August 28, 2018

Cabbage Patch Halibut – Come On, Use Your Head

Don’t worry; this cabbage-wrapped fish recipe has nothing to do with those creepy dolls. I just thought “cabbage patch halibut” sounded a little more enticing that the other names I was considering. 

Although, anything with the word cabbage in it isn’t going to have people’s mouths watering, which is how we got “coleslaw.” Despite all that, this really is one of easiest, and most delicious ways you can cook fish. 

The leaf not only keeps the halibut moist, but also holds all your assorted garnishes and seasonings tight against the meat, which creates an even more intensely flavored final result. Just be sure to save the rest of the head, since once chilled, and sliced thin, it makes for a very interesting salad. Or simply slice it thickly, and fry it up with a few sausages.  

This technique should work no matter what fish and ingredients are used, but you may have to adjust the cooking time. The type, size and shape of your fish filet are all variables that affect how long this is going to take. Best to check with a thermometer, and I generally go to for something between 130-135 F. for halibut, but other fish have different target temps, so do some research.

One last tip is to make sure you cut your other ingredients nice and thin, so they’re able to cook during the relatively short roasting time. Other than that, you are only constrained by your imagination. So, whether you put your own twist on this or not, I really do hope you give it a try soon. Enjoy!


Ingredients for 2 Portions of Cabbage Patch Halibut:
2 teaspoons butter for the pan
2 boneless, skinless halibut filets (about 7 ounces each)
salt and cayenne to taste
2 large steamed cabbage leaves
1 tablespoon thinly sliced fresh ginger
1 Fresno chili pepper, thinly sliced
2 tablespoons sliced green onions
1 tablespoon soy sauce
1/4 teaspoon sesame oil
fresh cilantro leaves to garnish
2 tablespoons miso butter (2 tablespoons butter mixed with 1 or 2 teaspoons of white miso, or to taste)

Friday, August 24, 2018

Juicy Lucy – So Jucy

No, that’s not a typo. Depending on whom you talk to, this cheese-stuffed burger is either called a “Juicy Lucy,” or a “Jucy Lucy.” That’s because two restaurants in Minneapolis claim to have invented it, and they spell it differently. The 5-8 Club goes with “Juicy,” while Matt's Bar saves a character and spells it, “Jucy.” Unless you end up on some kind of cheeseburger related trivia show, this is probably useless information, but hey, you never know. 

By the way, I’m not picking sides, but went with “Juicy,” simply to appease my spell-checker. No matter how you spell it, one thing is for sure; this isn’t just any old cheeseburger.

The cheese stuffing really does keep the meat juicier, and the mouthfeel is noticeably different that what you experience with a burger that has cheese melted over the top. However, for this to work you need to keep the cheese inside, which means making sure you thoroughly and thoughtfully press the edges of the two patties together.

Please note that the times I gave in the video may, or may not, be close to what you’ll need. There are so many variables such as fat content, meat temperature, pan temperature, cheese choice, and portion size, just to name a few. So, doing some testing before the big burger party is recommended. Best homework, ever! Above and beyond that, not much can go wrong, so I really do hope you give this a try soon. Enjoy!

Tuesday, August 21, 2018

Creamy Chicken Toast – A Recipe and a Reminder

I was watching golf the other day, and the announcer said that great golfers don’t need lessons, they only need reminders, and I immediately thought how well that saying applies to cooking. Well, this creamy chicken toast recipe is both a lesson (aka recipe) and a reminder, and a comforting one at that.

We’ll get to the recipe, but first, the reminder. Sometimes even I forget just how simple it is to make a cream sauce by reducing heavy cream. Almost every “cream sauce” you see is really milk thickened with some type of starch, usually a roux. These sauces are easy, and delicious, and we’ve made hundreds of them, but once in a while it’s nice to have the thing those concoctions are meant to mimic.

If you’re worried this might be too rich for you, keep in mind that by the time we add all the buttery roux to a milk-based sauce, we’re getting pretty close to the fat content of this. So, why not just do this with cream all the time? Cream is way more expensive than milk, and that’s before we reduce it. How much more? You know the old saying…if you have to ask, use milk.

As far as the recipe goes, I loved how this came out, but it begs for adaptation, especially when it comes to which diced veggies to toss in. Just be sure you cooked whatever you're using before you add the cream, since once that reduces, your dish is done, still crunchy vegetables, or not. Besides that, not much can go wrong, and a lot can go right, so I really do hope you give this a try soon. Enjoy!


Ingredients for 2 large portions:
2 small or 1 huge chicken breast (12 ounces)
salt to taste
1 tablespoon butter
thinly sliced green onions (the lighter parts)
diced red bell peppers
diced jalapeno peppers
1/4 cup chicken broth
1 1/2 cups heavy cream
2 tablespoons crème fraiche, optional
1 tablespoon freshly chopped tarragon
2 thick slices of toasted bread

Friday, August 17, 2018

Cast Iron Cornbread – Frugal Fabulous

What to bring to a cookout is always a tough call. Ribs or brisket would be great, but they’re not cheap, and take hours to prepare. On the other end of the spectrum, you could just bring a bag of chips, but that’s kind of weak sauce.

In fact, that’s probably worse that literally bringing a weak sauce, which is why this easy-to-make cast iron cornbread is such a great option. This stuff is very inexpensive to make, but that’ll be the last thing anyone will be thinking about as they eat, and if everything goes according to plan, you’ll be asked to bring it to the next gathering. Sure, every once in a while it would be nice to show up with a pulled pork shoulder, but hey, you’re the cornbread guy or gal, and that’s just your thing.

Above and beyond how much extra beer money this recipe will afford you, it’s also very adaptable. You can add things like hot peppers, cheese, and fresh corn, as well as adjust the texture to your particular tastes. I use a lot of buttermilk, since I don’t care for a super-dry, crumbly cornbread, but if you do, simply reduce the amount to one cup. You can also use plain milk for this, but I really do like the tang of the buttermilk.

As far as the butter amount goes, I’d usually use four tablespoon for the batter, and maybe only one or two for the pan, but this time I decided to melt the whole stick. It was borderline too much, so maybe keep that in mind if you don’t want it too rich, but as with all these recipes, I’ll let you experiment and figure things out. Either way, I hope you give this easy, and affordable cornbread a try soon. Enjoy!


Ingredients for 8-10 Portions:
1/2 cup melted unsalted butter, divided (half for batter, half for pan)
1 cup cornmeal
1/2 teaspoon fine salt
pinch of cayenne
3 tablespoons honey, or to taste
2 large eggs
1 1/2 cups buttermilk (or less for a drier texture)
1 cup self-rising flour*

- Bake at 400 F. for about 25 minutes or until a toothpick comes out clean.

*To make your own you self-rising flour, sift together 1 cup of all-purpose flour, with 2 teaspoons baking powder, and 1/2 teaspoon fine salt.

Tuesday, August 14, 2018

Grilled German Potato Salad – Warming Up to a Great Summer Side Dish

I’ve never been a huge fan of German potato salad, for two very good reasons. First of all, my love for mayonnaise borders on inappropriate, and secondly, the potatoes always seem to be under-cooked. 

I enjoy many things cooked al dente, but potatoes are never, ever one of them. I know people want clean, neat slices, but to me that’s just not a good enough reason.

However, if they’re cooked tender, especially over some smoky coals, I can forgive the lack of mayo, since this is a very flavorful change of pace, and as I mentioned in the video, perfect for bringing to a cookout. A German potato salad must be eaten warm, or at least room temp, so placing a bowl of this on a sunny picnic table works out very well.

I use a ton of bacon in my version, because it’s bacon, but if you do decide to use less, you’ll have to add some vegetable or olive oil to the dressing to make up the difference. You could just use less vinegar, but then you might not have enough dressing to really soak the potatoes, which would be a shame. So, what I’m trying to say is, use a lot of bacon. Either way, I really do hope you give this great potato salad a try soon. Enjoy!


Ingredients for 8 Portions Grilled German Potato Salad:
2 1/2 pounds Yukon gold potatoes, grilled until just tender
1/4 cup freshly chopped Italian parsley
For the dressing:
8 ounces sliced bacon
1 cup diced yellow onion
2 tablespoons white sugar
2 teaspoons kosher salt, plus more as needed
1 teaspoon freshly ground black pepper
cayenne to taste
1/2 cup white wine vinegar
Note: If you want you dressing tangier, add more vinegar, but if you want it less so, you’ll have to adjust with vegetable oil, since you can’t add more bacon fat.

Friday, August 10, 2018

Spicy Pork & Vegetable Tofu – Probably Not Mapo Tofu

This might look like I was trying to make a version of a famous Chinese dish called mapo tofu, but that's not the case, and in fact, I'm pretty sure I was making this before I knew what mapo tofu was. And now that I’ve addressed the people that were going to complain this isn’t authentic, we can continue.

I'm assuming that whatever I did get this idea from was most likely a version of mapo, but that's as far as it goes. Which reminds me, this is a great recipe to adapt to your own tastes, not only with the sauce ingredients, but also in regards to what vegetables you include.

Zucchini is our favorite, especially if you take the extra 15 minutes to salt it, but pretty much any dice-able seasonal vegetables will shine. So, please keep this one in mind as you browse the farmers market, but no matter what you put in, I really do hope you a give this delicious tofu dish a try soon. Enjoy!


Ingredients for 4 Portions:
1 1/4 pounds ground pork
1 pound firm tofu, cubed (my package was 14 ounces)
handful of sliced green onions
minced hot chili peppers, as much as you like
3 small zucchini, cubed, toss with 1 tablespoon kosher salt (rinse after 15 minutes)
freshly chopped cilantro to finish
sliced green onions for the top

For the sauce:
3 tablespoons Korean chili paste aka Gochujang, or other chili paste product to taste (click here to read a little more about Gochujang)
1/3 cup rice vinegar
1/4 cup hoisin sauce
2 tablespoons soy sauce
1 tablespoon ketchup
1 tablespoon sesame oil
4 cloves minced garlic
1 tablespoon finely grated ginger

Tuesday, August 7, 2018

Airline Chicken Breast – Come Pan-Fry the Friendly Skies

Welcome to another episode of food you only see in restaurants, starring the always eye-catching “airline chicken” breast. Legend has it that the name comes from the fact this cut of chicken is shaped like an airplane wing, but that’s not actually the reason. 

This beautiful breast is known as airline chicken because it was such a popular menu item back in the day, when airlines still gave their guests real food. Above and beyond the wing-like shape, this worked so well is because food for air travel needs to be cooked way ahead of time, which means it can dry out, especially something like a chicken breast, but by leaving the wing joint attached, that becomes a little less likely. Plus, once you finished your breast, you got to eat a chicken wing drumette. Now that’s value-added service.

As I mentioned in the video, please feel free to use whatever spices and seasoning you wish, since that will not affect the technique at all. I should have used fresh herbs inside for a little nicer appearance once sliced, but I think I more than made up for that with the sprig of rosemary. Regardless of how you flavor yours, I really do hope you give this a try soon. Enjoy!

Friday, August 3, 2018

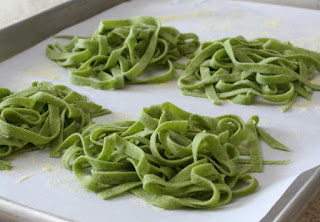
Fresh Spinach Pasta – Easy to Do, Occasionally

It’s very easy, and inexpensive to buy pasta at the store, which is why people do it so often, maybe too often, but every once in a while, when you want something specific, making a batch of your own can be fun, and rewarding. Besides, it’s kind of nice to get compliments for the sauce and noodles for a change.

By the way, don’t let the lack of a stand mixer with pasta attachments stop you from making this. For decades, I used a cheap, hand-cracked machine, which worked just fine. You can also go completely manual, and roll the dough into thin sheets, which after a little bit of drying, can be rolled up, and sliced into whatever size noodle you want.

Just be sure to use plenty of semolina, but that does work, and may produce the most satisfying results, imperfections and all. For the best texture, be sure to only cook your fresh pasta for just about a minute, before tossing it in your hot sauce.

If you dry your pasta, like I did with my twistaroni, you’ll need to give it a few extra minutes, or until it’s just tender, depending on the exact shape. Either way, fresh or dried, I really do hope you give this a try soon. Enjoy!


Makes 2 large or 4 small portions Fresh Spinach Pasta:
8 ounces fresh spinach (about 4 handfuls)
2 large eggs
2 teaspoons olive oil
1/2 teaspoon fine salt
about 3 cups all-purpose flour
semolina flour, as needed for rolling and cutting