Tuesday, March 29, 2011

An Early Spring Lunch

Today for lunch, Michele fried some sweet Italian sausage and served them on toasted, garlic-rubbed bread. Next to it was an ordinary green salad, made extraordinary with her kumquat and blood orange dressing. It was a perfect early spring lunch.

Monday, March 28, 2011

No Russian this Beef Stroganoff Recipe

Beef Stroganoff is one of my favorite recipes of all time, but not the classic Russian version, which had neither mushrooms nor onions, and was served over rice or fried potatoes. 

No, I prefer this this Americanized rendition that gets to sit on a pile of wide buttered egg noodles. There’s something about the rich, creamy, tender beef wrapped inside those fat ribbons of pasta that really does it for me.

Speaking of tender beef, this isn’t the quick-seared beef tenderloin filet you often see used in restaurants. That version is nice once in a while, but I prefer this slower, beefier recipe, which uses a much less expensive beef chuck roast. That’s right, more money for vodka!

One big reason I love beef Stroganoff so much is the sauce that features a substantial amount of sour cream. Of course, that’s great news when you have access to the world’s finest homemade sour cream supply, as demonstrated in the recent creme fraiche video.

This is a fairly lean version, as most similar recipes call for more cream to create a larger volume of sauce. This is something you can easily adjust to your tastes. I like a little thicker version, with just enough sauce to coat the meat and noodles.

Remember, the great thing about creme fraiche is you can cook it to reduce and thicken the sauce if need be. So, start a batch of creme fraiche soon, and you’ll have 2 days to plan the rest of beef Stroganoff dinner. Prijatnovo appetita!


Ingredients:
1 tbsp vegetable oil
2 pounds beef chuck roast
salt and pepper to taste
1 tbsp butter
1/2 onion, sliced or diced
8 oz sliced mushrooms
2 cloves garlic
1 1/2 tbsp flour
1/2 cup white wine
2 cups beef broth, divided
1/2 to 1 cup creme fraiche or sour cream
1 tbsp fresh sliced chives

Friday, March 25, 2011

Homemade Crème Fraiche – Nobody's Ever Made it Just Once

Crème fraiche is French for "fresh cream," which makes it one of the most ironically named foods ever, since it's made by leaving cream out in a warm spot until it’s soured and thickened by a growing colony of bacteria. Yeah, fresh.

Regardless, making crème fraiche is very easy and as the title implies, once you taste the magic of homemade sour cream, you'll have a hard time not repeating this somewhat esoteric exercise. Sure it takes a couple days, but the effort is minimal for such a marvelous payoff.

As I mention in the video, besides the amazing taste and luxurious texture, maybe the best thing about crème fraiche is its ability to be cooked. Because of it's composition and fat content, it doesn’t curdle and separate when you heat it like sour cream.

This makes it an incredibly versatile addition to countless recipes. I can't think of many pan sauces that don’t benefit from a spoon or two. Yesterday on this blog, you saw it stirred into fried rice. Next week, you'll see it turn an ordinary pan of braised beef into a world-class Stroganoff. I could go on and on, and for SEO purposes I probably should, but you get the idea.

As long as your jars and utensils are very clean, preferably sterilized, there isn’t a lot that can go wrong. Be sure to get your hands on the best, freshest cream you can find. In the supermarket you'll want to look for "pasteurized," not "ultra-pasteurized" heavy whipping cream. Also, be sure to use cultured buttermilk otherwise you’re going to be waiting a full day to see nothing happen.

By the way, I'm extremely proud of this video recipe and blog post, but not for the usual reasons. It's because I didn’t make one single Randy Marsh joke! You South Park fans know what I'm talking about, and those of you that don’t should really check out this crème fraiche-themed episode. Enjoy!


Ingredients:
2 cups heavy cream
3 tablespoons cultured buttermilk

Mix together and leave in a warm spot (about 70-75 degrees F.) for 24 hours, or until thick. Refrigerate for 24 hours before using. Should last a week or two. 

Thursday, March 24, 2011

Random Food Porn: Creamy Beef and Duck Fried Rice

This is not a tease for an upcoming fried rice video. As magnificent a meal as it was, this was simply the result of using up some leftover Thai takeout. However, this is a little tease for an upcoming crème fraiche video. A chef I used to work for would mix sour cream and herbs into leftover rice pilaf, and bake it in a casserole to create a new side dish. I believe that's what possessed me to add the dollop at the end. Enjoy and stay tuned!

Wednesday, March 23, 2011

Pickled Grilled Vegetables – Now, Why Didn't I Think of That?

This pickled grilled vegetables technique was my favorite new discovery on the Kingsford University trip. It's quite a simple, and seemingly obvious trick, yet it never occurred to me. It's times like these when I'm faced with the tragic realization that I'm not as smart and creative as I think I am.

Basically, small pickling cucumbers (which I've always called, "pickles," even if they aren’t pickled yet, just to be confusing), as well as other firm vegetables, are seared briefly over very hot charcoal, before being packed in the sweet and sour pickling liquid.

The grilling imparts a subtle smokiness, as well as a little extra sweetness from the caramelization of the vegetables. I can see these being a regular fixture on the picnic table during the upcoming grilling season. What a perfect compliment to a platter of barbecued pork, or grilled chicken.

These tasted great after just one day, and even better after three. Please don't ask me how long they will last in the fridge, as I believe they should be eaten before that would become any kind of issue. I hope you give it a try, and be sure to tell me all the fabulous ways you flavored your pickling liquid. Enjoy!


Ingredients:
(Adapted from a recipe by Chris Lilly)
6 pickling cucumbers
1 red bell pepper
1 cup sugar
1 cup white vinegar
1 cup water
2 1/2 tablespoons kosher salt, or to taste
big pinch of red chili flakes
12 black peppercorns
2 cloves garlic
1/4 teaspoon dried dill

View the complete recipe

Tuesday, March 22, 2011

What I Had for Breakfast

Some leftover barbecued pork belly from Sneaky's Barbecue was crisped-up in it's own smoky fat. The thin, red Carolina-style pepper sauce was drizzled around, and then two eggs were cooked to just-set in the sizzling pool. A perfect breakfast-for-lunch experience.


Coming Soon: Pickles and Cream

Well, the rain finally broke and I was able to dust off the old grill and film the pickled grilled pickles video I teased after the Kingsford University trip. To the right of those you'll see a jar of homemade Crème Fraîche, inspired by comments on our handmade butter post. Stay tuned!

Friday, March 18, 2011

National Corned Beef Hash Day

Apparently the official National Corned Beef Hash Day is celebrated on September 27, which is as arbitrary as it is ridiculous. Everyone knows the real National Corned Beef Hash Day follows St. Patrick's Day.

If you have some leftover corned beef, you should seriously consider making the hash recipe below. There really isn’t anything like a plate of crusty corned beef hash. Topped with a perfectly poached egg, it's not only a classic breakfast (and proven hangover cure), but makes for one hell of a dinner. To read the original post, and get all the ingredients amounts, click here. Enjoy!

Thursday, March 17, 2011

Homemade Butter – The Original "Elbow Grease"

When I saw my friend, Jennifer Perillo, do a homemade butter post on her great blog, In Jennie's Kitchen, I thought it would make for a very cool video recipe here. 

The problem was I have the world's ugliest food processor. It's chipped, yellowed from age, and simply not a good look. But it still works fine, so I'm not able to make myself throw it away and get another. Then I thought about doing a real homemade butter video; a true handmade version, without using any machinery whatsoever, save for the finely sculpted apparatus that is my arm. 

Besides not having to show my lame processor, I would also have the opportunity to do some Shake Weight jokes (among others); talk about a win win! Anyway, as you'll see, this technique worked wonderfully and really was a lot of fun. 

It tasted exactly like good supermarket butter. Of course, since it takes a lot more effort to do, and probably costs more to make than buy, you're probably wondering why bother?

That's a great question, and one I really hope you don't ask yourself before giving this a try. By the way, if you are a regular butter maker, please feel free to share any tips and tricks you may have. Enjoy!


Ingredients:
cold heavy cream (about 36% butterfat)

Wednesday, March 16, 2011

Happy St. Patrick's Day Eve

I can’t believe tomorrow is St. Patrick's Day! Seems like just yesterday I was shoveling snow at my mother's house. Anyway, it's too late to do any new Irish-inspired recipes, so I'll do the next best thing and post links to these three delicious videos (click on the recipe captions, and away you go).

By the way, any Irish drinking jokes you may hear in these clips were only meant to offend my Irish friends and family members, and not the general Irish-American community. Having said that, most of them will be too drunk to care tomorrow, so I guess it really doesn’t matter. Erin go Bragh!

Coconut Milk Red Curry Corned Beef and Cabbage

Hearty Irish Stew
Classic Corned Beef and Cabbage


My Snackpicks' White Bean Dip

This super easy white bean dip is perfect for those occasions when you have a few friends coming over and want to make a tasty snack or appetizer that's not going to take a lot of time, or break the bank.

I also like this recipe because it's not hummus. Don't get me wrong, I love hummus, but you have to admit, it's a little overused. If you took a picture of 100 snack tables at 100 random parties, I bet 75 of them would show a bowl of hummus.

This white bean dip recipe is part of a series of eight snack videos I did for Kellogg's Snackpicks.com. When you click on the video player below, you'll be taken to their fine site to view the video, and if you want, get the written recipe.

If you have questions or comments, please come on back and post them here. Thanks, and enjoy!


Tuesday, March 15, 2011

Summer Tomato Live!

My good friend, Darya Pino, who publishes the blog Summer Tomato has just launched a live, interactive nutrition class called "Summer Tomato Live." This episodic online classroom will focus on discussing a variety of reader-selected food and health topics.

You'll have the chance to ask questions and get answers from Darya in real time. I almost never recommend or promote things here that actually cost money, but knowing all that Darya has to offer, I think that the $3.99 per month subscription fee is a great deal.

While I don’t use as much of Darya's advice as I probably should, I really enjoy her blog, as well as her delivery. It's not the typical sanctimonious blather you get on some healthy-lifestyle websites.

If you want to check it out, here are the links to Episode 1 and Episode 2.

By the way, if you're interested in signing up, today is the last day to claim a couple free gifts from Foodzie and Zürsun Heirloom Beans, who sponsored the first 2 episodes. For more information on Summer Tomato Live, here is her official sign-up page. Enjoy!

Monday, March 14, 2011

Creamy Tomato Tuna Penne Pasta and the Great "Tuna Melt Defense"

This fast and easy creamy tomato tuna penne pasta recipe is inspired by one of my favorite lunches of all time; the tuna melt with cup of creamy tomato soup combo. Not only is this diner classic a great tasting meal, it's also the basis for what I call, "The Tuna Melt Defense."

Whenever I hear chefs (usually young American ones, trained in Italy) say that you may NEVER add cheese to a pasta that contains fish or seafood, I'm forced to use this argument to defend my firm belief that sometimes it's okay to do just that.

Who can argue against the deliciousness of the perfectly made tuna melt? I don't know anyone that loves both cheese and tuna separately that doesn't enjoy this classic grilled sandwich. Throw in a cup of tomato soup and you're talking about one of the best lunches ever.

So, if this combination is culinarily acceptable at Joe's Diner (by the way, this is the same diner those chefs I was talking about in the 2nd paragraph go to eat tuna melts after a late night out), then why in the world can’t we enjoy the same basic flavor profile in a bowl of pasta? I rest my case. Enjoy!


Ingredients:
1 (6.7-oz) jar of tuna packed in olive oil
pinch of dried oregano (if not already in the oil)
3 cloves garlic
pinch of pepper flakes
1 teaspoon mashed anchovy filets or paste
salt and fresh ground black pepper to taste
3 cups high-quality cream of tomato soup
1/2 cup water
14.5-oz package dry penne pasta
1 tablespoon minced fresh tarragon
2/3 cup finely grated Parmigiano-Reggiano cheese, more as needed

View the complete recipe

Fast Cars and Slow Food – Highlights of the 2011 Kingsford University

Last weekend, Michele and I were invited to participate in the 2011 Kingsford University, a NASCAR-themed barbecue and grilling event, held in everyone's favorite adult cartoon of a city, Las Vegas, Nevada. What follows is a photo recap of the trip's highlights. I don't do multipart event posts, so this is a little long, but I promise it will be a quick read. Enjoy!

The first night featured a welcome dinner at Tom Colicchio's Craftsteak. The festivities began with a cocktail hour where we got to meet and greet our fellow attendees. While saddened more former classmates from the fabulous Healdsburg event in 2009 weren't there, we were thrilled a few were, including good pals (and a couple of my favorite food bloggers), Brooke from Food Woolf (right) and Tamar from Starving Off the Land. While the steak tartare appetizer was a special treat, it couldn't compare to catching up with these two!

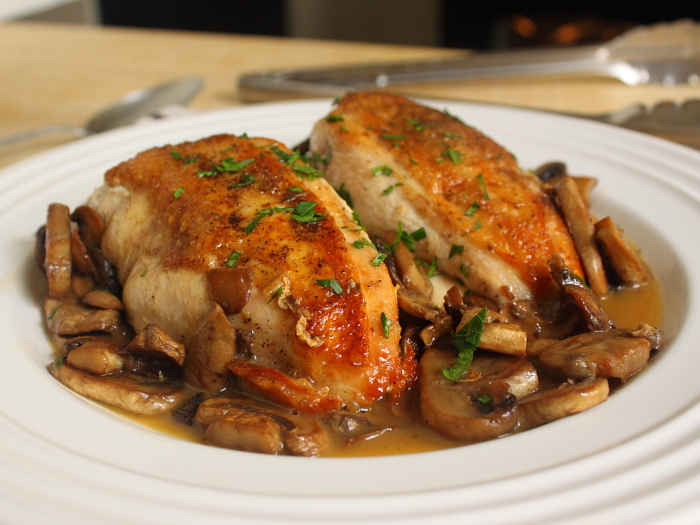
I'm a huge fan of Top Chef, which means I'm a huge Tom Colicchio fan, but I'd never had the opportunity to dine at one of his restaurants. It was worth the wait. We enjoyed a great steak dinner. The meat was American Kobe from Snake River Farms, and it was some of the finest beef I've ever had.

All the food at Craftsteak is served family-style, and besides an array of fantastic side dishes, like a perfectly dressed shaved fennel salad and pomme puree (I estimate 40% of this was butter), there were heavy copper pans filled with a trio of Waygu beef. We enjoyed tenderloin filet, flatiron steak, and the crowd favorite, and incredibly juicy and flavorful skirt steak.

Normally a pan of wild salmon this lovely and delicious would have been the talk of the table, but such was the staggering quality of the beef that it was barely noticed, and only picked at out of respect for the cooks who has so expertly prepared it.

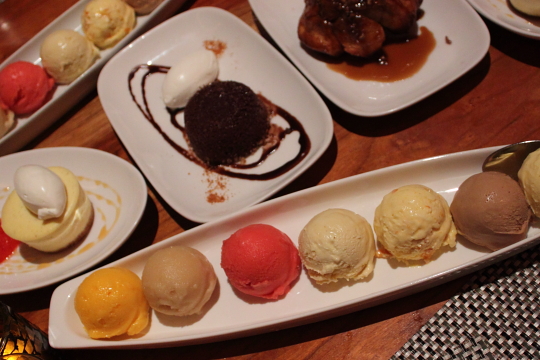
A beautiful assortment of desserts followed, but due to all the bourbon and red meat I'd absorbed, I decided to pass on everything except a small piece of monkey bread that just happened to stick to my fork. Sooner rather than later there will be a monkey bread video posted on this blog. It was a great dinner and made for a fine start to the weekend.

The next morning we bused out to the Las Vegas Motor Speedway for what would turn out to be a full day of grilling, chilling, drinking, eating, and a surprisingly significant amount of learning. I don't pretend to attend these types of food and wine events for any other reason than the food and the wine, and while there are usually all manner of lectures and demos interspersed between bites and sips, it's often things I've seen and/or done before.

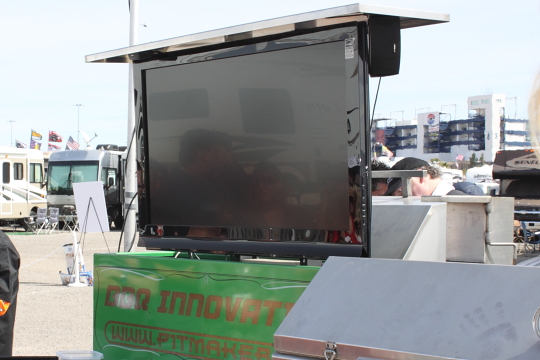
This was different. For me this Kingsford University was truly a place of learning. Our "classroom" was a white tent staked out in front of rows of shiny, black kettle grills, next to a barbecue rig so mechanically advanced and tricked-out that it rivaled the thousands of customized RV's which surrounded us. We're talking state of the art grill/smoker with Bose speakers and an HD television.

Our lead instructor and master of ceremonies was legendary pitmaster, Chris Lilly from Big Bob Gibson's BBQ. As far as I'm concerned, Lilly is "the man" when it comes to barbecue chefs in America. A natural born teacher, who's perfected the art of smoky, slow-cooked meat. While his food is rooted in classic, time-tested techniques, he's still able to somehow work in some interesting twists.

Chris demonstrated how he does his award winning barbecued beef brisket. Unlike the forgiving pork shoulder, which even a lucky novice make halfway decent as long as they stay relatively sober, a beef brisket will expose a fraud faster than a pair of cheap cowboy boots.

First, the brisket is given a wet rub with beef base, before the dry rub is applied. I had never seen this before, and not only does it help create an amazing crust or "bark," but the pan juices benefit mightily as well.

After the wet and dry rub, into the smoker it goes, which is kept at between 225-240 degrees. After about 4 hours, or when the internal temperature of the brisket reaches 170 degrees, it's removed, wrapped tightly with aluminum foil, and returned to the smoker. There it stays until it reaches an internal temp of 190 degrees.

After resting for a minimum of 30 minutes, someone with a sharp knife (and cold beer) slices it against the grain into thick slabs. It's served as is, or with the intensely beefy drippings drizzled over the top. Here, however, those juices were actually saved to go over the potatoes. It was as good as it looked.

The next demo was by Chef Alan Turner, from Snake River Farms. He gave a very entertaining class on some of the alternative cuts of beef. One of the most interesting part of his presentation was on something called a Manhattan Filet.

As the size of American cattle has increased in proportion to the waistlines of it's intended market, the classic New York strip steak has simply become too big. The ideal thickness of a steak is about 1 1/2-inches. This allows time for that desirable charred crust to form before the inside gets past a perfect pink. The problem is that to cut these modern strip loins into steaks that thickness, they are just too big for a normal diner to eat.

Chef Alan showed us a brilliant solution to this too-much-of-a-good-thing issue. He splits the strip loin lengthwise to form what looks like two large tenderloins. These pieces are then cut into beautifully thick medallions and sold as "Manhattan Filets." I love everything about this new steak shape breakthrough.

The other thing I loved about Chef Alan's demo is that every time he finished talking about a cut, he tossed it on the grill and we got to eat it. Well played, Sir. By the way, kudos to the fine people at Snake River Farms, who by all accounts run one of the most responsible and sustainable cattle and hog operations in the land.

Next we got to see Chef Stephen from the National Pork Board butcher half a hog. He was very knowledgeable, but in all fairness he did have a pork meat chart "cheat sheet" tattooed on his arm. I've seen this done before, but Stephan focused on many unusual cuts of pork not commonly seen in the super markets. One trend you will hopefully be seeing soon is a big increase in the variety of choices in that particular part of the meat case.

Things like pork brisket, which we got to sample after a quick sear on the grill, and various steaks cut from the shoulder and sirloin. They don’t call it "the other white meat" anymore, but maybe they should call it "the other lean meat." As the chef pointed out, many of the leaner cuts of pork, like the tenderloin, have the same fat as a chicken breast.

I will pass on one great brining tip he shared with us. He recommends brining the leaner cuts of pork using the following formula: 1 cup each of salt and sugar dissolved in a gallon of water (plus whatever spices and flavorings you like). Then brine the pork for 30 minutes per inch thickness of the cut you are using. For example, a 2-inch think double-cut pork chop would soak for 1 hour before heading to the grill. I believe I will be testing this method for accuracy many times this summer.

Our Kingsford University weekend ended with a day at the races for the Kobalt Tools 400. This portion of the program had nothing to do with food or grilling, so I don't have much to report other than to say, if you like watching cars drive around in a circle for a few hours, and/or have a fetish for corporate branding, then this is as close to heaven as you'll ever get. While I'm no motor head, I do enjoy a quality mullet as much as the next blogger, and it was fascinating getting a glimpse into this great American subculture.

A huge thanks to Kingsford Charcoal for hosting us so generously on this trip. Thanks to Chris Lilly, Snake River Farms, the National Pork Board, and everyone else involved for such a delicious and educational weekend!

Friday, March 11, 2011

Fresh, Homemade Flour Tortillas in No Time Flat

I was debating whether to call these supple, delectable discs, "tortillas," or "flatbreads," but since they were inspired by my testing of the Imusa tortilla press, seen herein, I decided to go with tortilla. This intro is dedicated to hungry SEO gurus everywhere.

Regardless of what you call them, if your only experience is with the dry, mundane supermarket varieties, you are in for a serious treat. Homemade tortillas are so much better that if you do decide to give these a try, be warned that you'll have a very hard time ever going back to the packaged option again.

Not only is the recipe very easy to make, there's no waiting hours for anything to rise, so in less than 30 minutes, you'll be enjoying the finest in hand-held meat delivery systems. Ironically, I failed to have any juicy grilled meat ready for the money shot, so I was forced to enjoy them au natural.

As I mention in the video, the hardest part of the entire procedure is rolling the dough balls into nice thin discs, but if you have a tortilla press this becomes very fast and easy. Since this post was made possible by my friends at Imusa, who also provided the press you see here, I'll included a couple links in case you want to add this apparatus to your kitchen tool collection.

I hope you give these a try soon, and your days of using store-bought tortillas comes to a warm, soft, and delicious end soon. Enjoy!

If you are interested in a tortilla press of your very own, here are a couple links:


Ingredients:
8 ounces all-purpose flour (about 1 3/4 cup), more as needed
3/4 tsp salt
1/4 tsp baking powder
1/4 cup vegetable shortening
1/2 cup hot water (about 105 degrees F.)

View the complete recipe

Wednesday, March 9, 2011

Just Chicken and Mushrooms

This chicken and mushrooms recipe video is an experiment in extreme self-control. I wanted to challenge myself to make a chicken and mushrooms recipe using only chicken and mushrooms. By the way, if it was still Fat Tuesday, I would have totally called this recipe, "Almost Naked Breasts," but on Ash Wednesday, that just doesn't seem appropriate.

While chefs are always preaching about keeping things uncomplicated, and letting the natural goodness of the main ingredients shine though, we rarely follow our own advice. There are so many ways to flavor and enhance breasts like these that it's easy to forget simplicity and instead start, "layering the flavors."

As I mention in the video, while this may seem like it was intended as a lesson for novice cooks, it's actually dedicated to the advanced cook who may have forgotten just how wonderful a two-ingredient recipe can be.

Now, before the more anal among you start sending in the, "there are actually five ingredients" comments and emails, I'll tell you right now, I'm not counting salt and black pepper as ingredients, nor am I including the fats. Hey, I have to sear that skin in something.

Anyway, the real point is to get you to try and see how much flavor you can coax out of these two main players by simply using great technique, and the right equipment. Of course, that's easier said than done, and the vast majority of you will be unable to resist the minced garlic and the cayenne shaker. Either way, enjoy!

Speaking of the right equipment, that stainless-steel skillet you'll see in the video is my lovely new All-Clad 12-inch aluminum core frying pan. We're going to be doing some work together, and this recipe was the first real test run. I've used their stuff countless times in pro kitchens, but I've never the pleasure of working with it in my home kitchen until now. It was perfect for this recipe's required techniques.


Ingredients:
2 large chicken breasts, boneless, skin-on
salt and fresh ground black pepper to taste
2 tablespoon olive oil
8 oz thickly sliced mushrooms
1/2 cup water
1 tablespoon butter