And, as always, enjoy! If you want more information about why the blog format has changed, and why we're now offering complete written recipes, please read all about that here.
I’ve wanted to do a video for baked cheeseburger sliders for
a while now, but I’ve also been craving a meatball sub, so long story short,
this is what I ended up with, and they were amazing. Above and beyond some
decent ingredients, the real secret to these beauties is placing the meatball in through the
top of the roll, versus splitting and stuffing in the traditional manner.
I can’t explain exactly why, but there’s something very
special about these, and they really were a lot of fun to eat. Maybe it ‘s the
symmetry, or center of gravity, but they just feel right in your hand. I’m not
sure who invented this technique, but I first saw it on a blog called, Cooking for Keeps, so they get the credit for now.
Like I mention in the video, this easy procedure would lend
itself to all kinds of variations, and I expect to see some great ones shared
on social media soon. We’re getting close to the Super Bowl, and like I said
before, it’s not about who wins the trophy, but rather who wins the snack
table, and if you show up with these, that will be you. So, I really do hope
you give these meatballs-stuffed garlic bread sliders a try soon. Enjoy!
Ingredients for 18 Meatball-Stuffed Garlic Bread Sliders:
18 dinner rolls (I used Hawaiian rolls, but will try regular
less-sweet ones next time)
3 tablespoons butter infused with 3 or 4 cloves of crushed
or minced garlic
1 pound grass-fed beef
1 diced yellow onion and a few cloves of garlic sautéed
until soft in olive oil
2 tablespoons freshly chopped parsley, plus more for garnish
1 large egg
1/4 cup plain breadcrumbs
1 cup grated fontina cheese, divided (big handful in the
meatball mix, and the rest on top)
2 teaspoons kosher salt
freshly ground black pepper and cayenne to taste
2 cups prepared tomato sauce
freshly grated Parmigiano-Reggiano cheese for the top
A friend of mine asked me recently if
I’d ever heard of mumbo sauce, since she had just returned from Washington
D.C., and said it was “everywhere.” I hadn’t, which isn’t a surprise, since
unless you’re from the Capital, or select neighborhoods in Chicago, this stuff
is virtually unknown.
Apparently, this sweet-and-sour
condiment came to Washington D.C. via Chicago, where it somehow became a
staple in Chinese take-out restaurants, served as a condiment with fried
chicken wings, among other things. That’s as
much background as you're getting here, and like many other regional culinary
specialties, the history is murky.
All I know is that this was great with
fried chicken wings, and I look forward to finding other uses for it, although
I’m not sure French fries is going to be one of them. I’m a ketchup guy, and probably
too old to change. Having said that, I can see this catching on, and for once,
I’ll be ahead of a trend.
They say every takeout place in D.C.
has their own secret recipe, but there were quite a few published recipes on
the Internet, and so this is sort of a composite, based on the extensive, 20
minutes of research I did. Stay tuned for the chicken wing experiment I
mentioned in the video, and in anticipation, I really do hope you give this a
try soon. Enjoy!
Ingredients for about 4 cups of Mumbo
Sauce:
1 can (6-oz) tomato paste
2/3 cup ketchup
1 cup pineapple juice
1 cup distilled white vinegar
1 lemon, juiced
2/3 cup sugar
1/4 cup honey
2 tablespoons soy sauce
1 1/2 tablespoons freshly grated ginger
1 teaspoon cayenne pepper
- Please note: Every one of these
ingredients is “to taste.”
Welcome to part two in this series for how to make your own sourdough
bread, using nothing more than flour, water, a little salt, and a whole lot of
time.
Yes, making your own sourdough does take a while, but the amount of
actual work is minimal, and the bread you’ll get is spectacular…at least in San
Francisco. Your results may vary.
While I’ve made sourdough before, I’ve never actually had to
provide specific measurements, which is why I’ll credit Northwest Sourdough
once again, since the amounts below were slightly adapted from there. Speaking
of which, anything you’re not sure about after watching this, can be cleared up
by visiting Teresa’s amazing channel.
If you don’t have a banneton, you can simply line a similarly
sized bowl with a tightly woven cotton kitchen towel, which has been generously
coated with rice flour. I’ve used that before, and it works exactly the same.
The only difference is the wooden basket “breathes,” unlike a metal bowl, but I
don’t think that’s a huge deal.
Since the wild yeast and bacteria that make this bread work
vary from one part of the country/world to another, I can’t guarantee you’ll get
the same results I did, but nevertheless, I really do think you should try
anyway. In fact, if you do have some success, I’d love to see the results
posted on Twitter for all to see.Good
luck, and as always, enjoy!
Ingredients for one loaf:
100 grams starter
250 grams water
8 grams kosher salt
394 grams white bread flour
(You’ll also need rice flour for the 10-inch banneton)
- Let ferment for 4 hours, “folding” at the 2 hour mark
- Form loaf and transfer into prepped banneton
- “Retard” dough in fridge for 10-12 hours
- Let rise in warm spot for 3 to 5 hours or until it passes
“poke test”
I didn’t think I liked Cuban sandwiches, and even went so far as to publicly call them
overrated, but it turns out I was eating them on the wrong bread.
You can’t
just use any old sandwich roll, and this fact was lost on me until I had one on
the real deal. Shortly after finishing, I recanted every negative comment I’d
previously made.
By the way, if you’ve
never heard of a Cuban sandwich, stay tuned, because that will be the star of
our next video. If you want to get a head start, besides practicing the bread,
you’ll need some type of roasted, or pulled pork; and I’m happy to report we have many
recipes that would work, including our famous paper pork,pulled pork, or
carnitas.
One thing that makes
this bread unique, besides the addition of lard, is the double-hit of yeast. We
use dry yeast to start the dough, as usual, but also add a starter that we let
ferment overnight. I assume that’s to provide a little extra flavor, as well as
a some additional lift, but I didn’t want to do too much research, since I do
enjoy a little mystery with these types of things.
Traditionally, some
of the starter is saved, with a little fresh water and flour added, and kept in
the fridge to make more bread. Not a bad idea, otherwise you can probably just
add all of it to the dough. You’ll probably need a bit more flour, but as I
stressed in the video, we’re going to be feeling for that anyway. So, stay
tuned for the Cubano sandwich video, and in the meantime, I really hope you give
this bread a try soon. Enjoy!
For the starter:
1/2 cup warm water
1/2 cup flour
1/2 teaspoon dry
active yeast
- mix well and
refrigerate overnight
For the dough:
1 package active dry yeast 2 teaspoonssugar 3/4 cup warm water
- mix and let stand 15 minutes
- add starter from day before (reserve
1/4 cup if you want to keep your starter going), plus:
3 tablespoonslard 2 teaspoons fine salt
about 3 cups flour, or as needed (I
used 1 1/2 cupall-purpose
flour
and 1 1/2 cupsbread
flour) water to spray tops of loaves
This mille feuille, which I’m sure I pronounced perfectly in
the video, is also referred to as a Napoleon, and is the easiest, “fancy”
pastry I know. The technique for creating your “thousand leaves” is very
simple, especially if you use frozen dough, which any sensible person should
do.
Whether you use frozen or homemade dough, the key is to keep
it flat. We do this by “docking” the dough, and pressing with another pan. I
used a few layers of foil before placing the pan on top, to make sure it was in
contact with the dough, and depending on the size and shape of your pans, you
may need to do the same.
Most patisseriers will make these well ahead, and keep them
in the fridge, so that the pastry softens a bit, as it absorbs moisture from
the filling. This is standard procedure, and they are much easier to eat that
way, but I actually prefer to enjoy them right away, so as to fully experience the
contrast between the crispy, buttery pastry, and the cold, creamy custard.
Stay tuned for the new and improved pastry cream video heading your way soon. In the meantime, your favorite recipe should work,
as well as things like whipped cream, sweetened ricotta/mascarpone, and/or
lemon curd. I really hope you give this a try soon. Enjoy!
-- Bake at 400 F. for about 15 minutes “pressed,” and then
continue for another 10-15 minutes, uncovered, or until browned and crisp. I
turned mine once during that time.
-- To make the icing, simply add enough water or milk to powdered sugar, until the right consistency is reached.For the chocolate one, I started with one part unsweetened cocoa to four parts powdered sugar, and then stirred in the liquid. Check this video if you are confused.
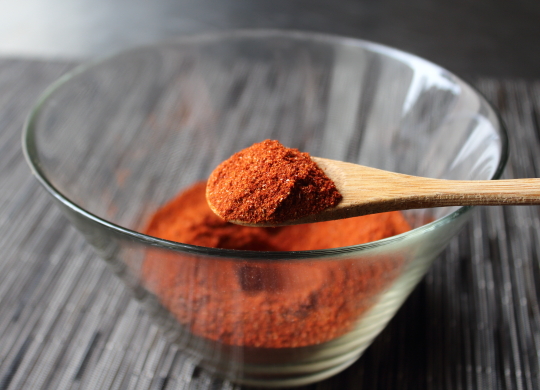
I love berbere spice, but it never occurred to me to make my
own. I usually get it pre-mixed from the fancy grocery store, and it’s never
disappointed, but I’ve wanted to feature it in a recipe, so I figured I’d also
show how to make a batch from scratch.
Well, sort of from scratch. To make this “for real,” you
need to buy the whole spice seeds/pods, toast them, and grind it yourself. It
does make a difference, but I rationalize not doing all that extra work because
I usually toast the spices during the cooking process anyway.
I’m not exactly sure what dried chili pepper(s) would be
most authentic, but many people are saying that the New Mexico chili I used
does a nice job. They have a nice, sweet, earthy flavor, and
are sort of medium spicy. If you can’t find it, they say California or ancho
chilies can work.
Like I said in the video, please use
the ingredients and amounts below as an outline, and adjust this to your
tastes. Once you’ve perfected your formula, you’ll be the proud owner of one of
the most delicious, and versitle spice mixes ever. I hope you give this a try
soon. Enjoy!
Ingredients (everything can/should be adjusted to taste):
1/2 cup ground dried New Mexico chiles
1/4 cup paprika
1 generous tablespoon cayenne
1 teaspoon onion powder
1/2 teaspoon garlic powder
1 teaspoon ground ginger
1 teaspoon cumin
1 teaspoon ground coriander
1 teaspoon ground cardamom
1 teaspoon fenugreek
1/2 teaspoon ground cinnamon
1/4 teaspoon ground nutmeg
1/2 teaspoon ground allspice
1/2 teaspoon ground cloves For the chicken: 1 boneless skinless chicken breast, seasoned with salt and berbere spice to taste 2 teaspoon melted butter 1 lime, juiced 2 teaspoon tomato paste 1/4 chicken broth, or as needed 1/3 cup coconut milk 1/2 tsp berbere spice salt to taste 1 tablespoon chopped cilantro
I don’t usually like to put words like “real” or “classic”
in front of recipe names, since who the hell really knows, but in the case this
aioli, I’m feeling pretty confident. In its purest form, this amazing sauce is
nothing more than olive oil emulsified into freshly crushed garlic, seasoned
simply with salt and lemon.
It arguably the greatest cold sauce of all time. Speaking of
cold, the health benefits of regular aioli consumption are legendary. There’s
not much not to like here, unless you don’t like garlic, then there’s plenty.
This is pure, fiery, intense garlic flavor like you may have never tasted. It’s
also a clever trick to get you to buy a wooden, or marble mortar and pestle.
Sure, if you don’t have one you can smash the garlic against
the cutting board, with the flat of a large knife, and sort of do the same
thing, but you don’t get the extra pulverization when emulsifying the oil.And it’s all about the pulverization.That’s what releases all those volatile
compounds in the garlic, producing aioli’s signature flavor. I really hope you
give this a try soon.Enjoy!
Ingredients for about 2/3 cup Real Aioli:
4 large FRESH garlic cloves, peeled and sliced
1/2 teaspoon kosher salt, or other course grain salt
1 to 2 teaspoons freshly sqeezed lemon juice or vinegar, or
to taste
1/2 cup *light flavored extra virgin olive oil 1 or 2 teaspoons of water to adjust texture
- Note: This is best eaten fresh, but should be okay for about24 hours.
* Since this sauce has such a sharp, hot flavor from the
garlic, you don’t want to use a really strongly flavored olive oil. We don’t
want anything too peppery and bitter, which will clash with the garlic. Use
something on the mild side, or cut with a neutral vegetable oil.
It’s not often I reduce the amount of cayenne in a recipe,
but that’s the case with this striking, and intensely spiced Nashville hot
chicken. If you’ve never had it, we’re talking about an ultra-crispy fried
chicken, doused with a cayenne-infused glaze, and by “glaze” I mean melted
butter and lard.
It sounds crazy, but it's basically like being able to put lots of hot sauce on fried chicken, without it getting soggy. For the record, I’ve never been
to Nashville, so I can’t tell you how authentic this is, but it works for me,
and is fairly easy to pull off.
By the way, do yourself a favor, and toss the
chicken with a tablespoon of kosher salt the night before you fry, and you’ll
get a nicely seasoned, moister bird.
You can cut up a whole chicken, or just buy a package of leg
sections, which work great in this recipe. If you want to see how to cut up a
chicken, check out this old buttermilk fried chicken video. I cut the breasts in
half in that one, but the technique is the same. I really hope you give this
amazing fried chicken recipe a try soon. Enjoy!
Ingredients for Nashville Hot Chicken:
1 whole chicken, cut into 8 pieces, tossed with 1 tablespoon kosher salt, and refrigerated overnight.
For the marinade:
1 cup buttermilk
1/4 cup pickle brine
2 tablespoon Louisiana-style hot sauce
1 large egg
For the flour:
2 cups AP flour
2 teaspoons fine table salt or 4 teaspoon kosher salt
For the sauce:
1/4 cup lard
1/4 cup butter
2 tablespoons cayenne pepper
1 tablespoon packed light brown sugar
1 teaspoon paprika
1/2 teaspoon garlic powder
1/2 teaspoon kosher salt
1/2 teaspoon freshly ground black pepper - Heat oil to 350 F. and maintain temp of 325 F. during frying. Cook to at least 160 internal temp.
Maybe it’s the billionaire(s) in the news lately, but for some
reason I decided to take one of America’s most frugal meals, franks and beans, and
give it a high-end makeover. Besides, all the other classic comfort foods have
been fancified, hipsterized, and/or molecular gastronomized; so I figured I
would take this one down. And by down, I mean up.
Usually, franks and beans is made by opening up a couple
cans of baked beans, and heating it up with some sliced hotdogs. Not exactly
something you’d serve to visiting dignitaries. However, by adding some fresh
veggies, plain beans, and high-quality beef hot dogs, we can achieve something
much healthier, equally delicious, and every bit as comforting.
So, how much more will it cost you to make this usually cheap
dish, using these upscale ingredients? It’s tempting to say, if you have to
ask, you can’t afford it, but that’s not the case. Sure, the Kobe hotdogs will
cost you a couple extra dollars, but the rest of the dish is still quite
inexpensive. I really do hope you give this a try soon.Enjoy!
Ingredients for 4 portions Franks & Beans:
2 tbsp unsalted butter
1 diced yellow onion
1 diced poblano or other green pepper
2 tbsp minced fresh cayenne pepper, or other hot red pepper
1 rib celery, diced
1 pound hot dogs, sliced (literally any other sausage will
work here)
Is there any more representative image of Spring than a couple ladybugs making love on a spear of asparagus?
This great photo by Flickr user Benimoto inspired me to post a few links to some previously published asparagus recipes.
One of my biggest vegetable pet-peeves is undercooked asparagus. Many cooks are so afraid to overcook it, they tend to not cook it long enough, and this results in a still bitter stalk. There's a perfect degree of doneness where the spears are just tender, and the natural sweetness shines through. So, go buy a couple bunches of fresh asparagus, and give one of these recipes a try. Enjoy!
You had some on Friday, and maybe Saturday; but by today, leftover turkey is the last thing you're craving. Well, we may have just the thing(s). The following recipes are perfect for using up the last of that holiday bird, while at no time reminding anybody of that holiday bird. If you're interested in seeing the full post, just click on the recipe title, and away you go. Enjoy!
The moist filling will bring the driest turkey back from the dead, and you can literally add anything that can be chopped up.
Leftover green beans? Throw it in. Peas and Onions? You bet’cha. Cranberry Sauce? Don’t be ridiculous.
If chicken soup is called, "Jewish penicillin," then we're going to have to refer to this as "American amoxicillin." Really doesn't have the same ring to it. Regardless, this is a great soup.
As everyone knows, tomorrow is National Toasted Marshmallow
Day, and while I’ve never done an actual toasted marshmallow video (because
that would be ridiculous), I do have something even better to celebrate with...this s’more ice cream pie! Not only is this very easy to make, and a proven
crowd-pleaser, but just think of all the money you’ll save on sticks. Follow this link to read the original post. Enjoy!
I just heard on CNN that today is National S'mores Day. I've never done an actual s'mores video, but we did do this delicious ice cream pie inspired by them. I'm not around a lot of campfires these days, but when do I get a craving, this frozen version does the trick. Follow this link if you want to check out the original post, and get ingredients. Enjoy!
Just in case our recently featured pumpkin cheesecake isn't your thing, here are some additional ideas as we head towards the Thanksgiving holiday. It's kind of a mystery why we only enjoy these recipes this time of year, since they're all made with available-anytime ingredients, but whatever it is, it's probably the same reason people don't make s'mores in the winter.
Anyway, I hope you give some of these great pumpkin recipes a try soon, while there's still time. Just click on the recipe title links, and away you go. Enjoy!
Every once in a while I get a food wish that instantly takes
me back to culinary school. Things like aspic (not happening), larding a
tenderloin (not happening), and pulled sugar (sort of already happened) always
transport me back to those demos where the instructors fully admitted that we’d
probably never use these skills, but since they were considered “classic
techniques,” we’d have to spend time covering them anyway. Sure, makes perfect
sense.
This fabulous fondant potato technique is a prime example.
Made them a few times in school and loved them. Made them a few times at a
hotel early in my career and loved them. Haven’t made them since, and not
exactly sure why. They taste amazing, and as I try to make clear in the video,
the texture this method provides is unlike anything you get by just roasting.
The way the crusty, crunchy edges outside, works with the uniquely rich and
creamy inside is truly a magical thing.
I just think that we’re so used to the usual rotation of
potato side dishes; fried, roasted, mashed, etc., that it’s hard to push
ourselves to do a potato recipe that has multiple steps. In fairness, the
multiple steps are super easy, but still. Anyway, if you’ve never experienced the
old world awesomeness that is the fondant potato, I hope this video inspires
you to try. Enjoy!
Ingredients for 6 fondant potatoes:
2 tbsp vegetable oil
3 large russet potatoes (other varieties will not work as
well)
salt and pepper to taste
a knob of butter (a 2 or 3 tablespoon size chunk)
4 thyme sprigs
1/2 cup chicken broth or stock, more if needed *Roast at 425 F until tender, about 30 minutes View the complete recipe
Trick question; he doesn’t have one. That type of thing is
more for women and food bloggers. In fact, your dad may not even have a
favorite dessert, but if he had to pick one, I think a lot of fathers would go
with s’mores – the campfire classic that inspired this frozen Father’s Day
dessert.
S’mores are a simple, yet brilliant treat that represents
everything most males, dads or otherwise, seem to love. It’s made over a
crackling fire, the building of which triggers the release of all kinds of
manly neurotransmitters in the brain. The same goes for sharpening sticks with knives,
impaling things, and burning stuff.
And while you’re not experiencing those primitive pleasures
here (except for the blowtorch, which is never not awesome), I think just the
connection with the venerable s’more alone will be enough to have dad loving
this pie.
If not, there’s always the crispy, buttery graham crackers,
chocolate ice cream, and toasted marshmallows to make him proud of you anyway.
Whether you make this for Father’s Day dessert or not, I really hope you give
this a try soon. Enjoy!